Transfer Money
Use the feature to transfer funds from the user's account to other accounts, transfer funds to P2P recipients, view recent transfers, manage scheduled transfers, and manage recipients.
The application supports the following:
- Transfers to user's own accounts in the same bank
- Transfers to other members of the same bank
- Transfers to other banks
- International transfers
- Wire transfers
Users can schedule a transfer to be executed at a later date. It is also possible to set up recurring transfers. Recurrence can be defined to end on a specific date, after a certain number of recurrences or when the user cancels the transaction.
For scheduling recurring transfers, Temenos Digital Digital Banking provides a common data model and the capability to integrate with third-party systems. The actual storage of running any back-end recurring jobs, communicating with the core banking or other system is determined by the third-party provider.
Menu path: Web Channel
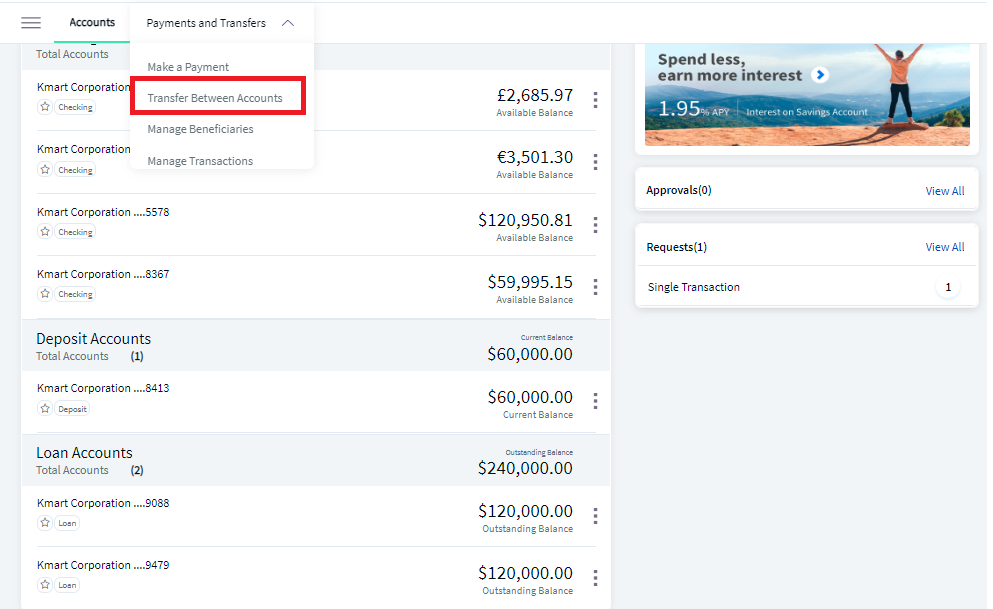
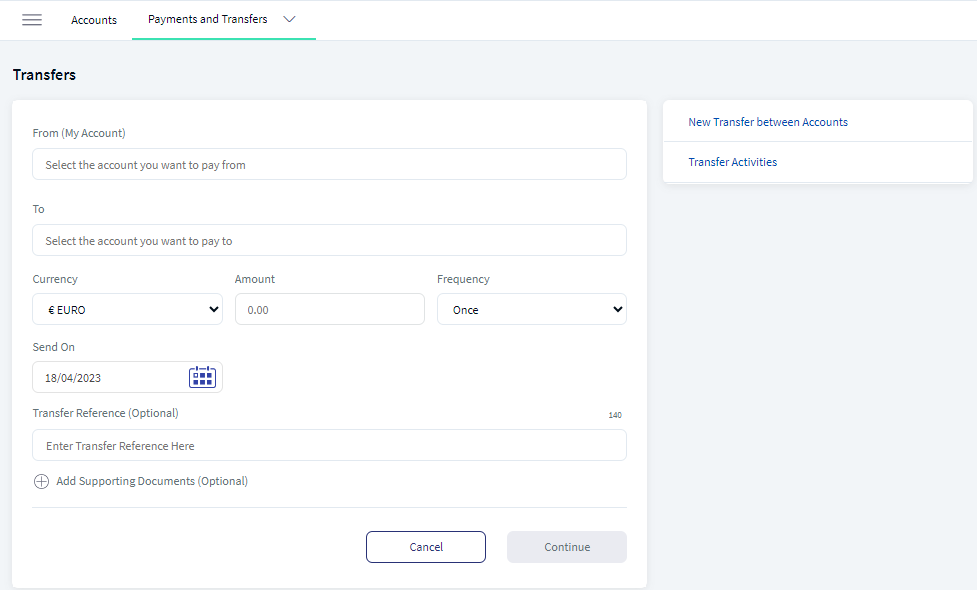
On the top bar, click Transfers, and then click Transfer. The app displays the Send Money screen.
Menu path: Mobile Native
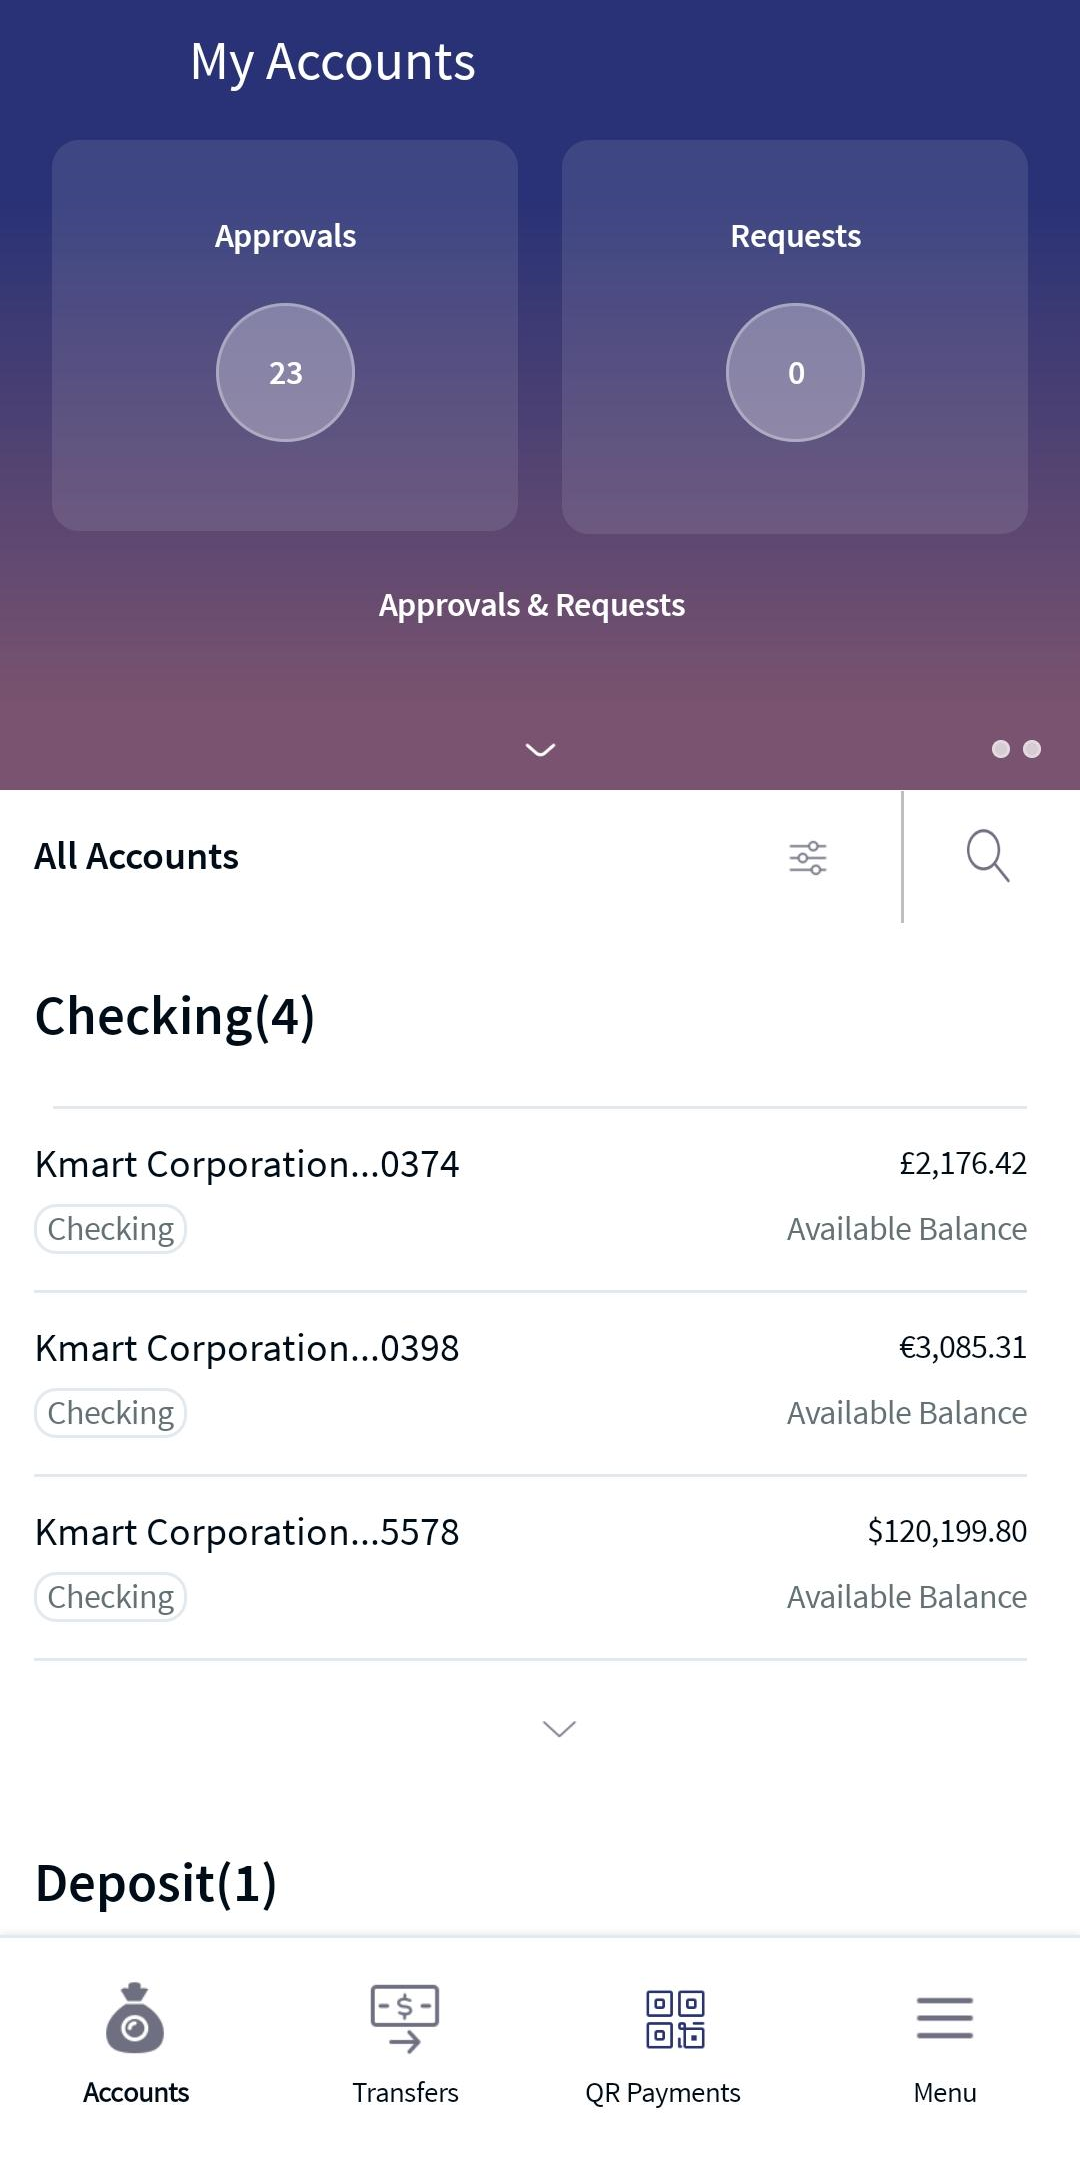
From the bottom menu tap Transfers. The app displays From screen with the list of accounts to transfer from.
The Transfer screen displayed the following information:
- Send Money. Initiate a new fund transfer to the user's own accounts within the same bank. to other accounts within the same bank, to other bank accounts, to international accounts, Person to person transfers, and wire transfers.
- Add Recipient. You can add members as recipients to transfer funds in the same bank, other banks, and international banks. You can add the following recipients:
- Add Digital Banking Account. You can add a recipient who has an account within the bank by providing the details such as account number, account type (Checking/Savings), account beneficiary's name, and nickname.
- Add External Account. You can add a recipient who has an account in another bank (domestic) by providing the details such as bank name, account number, account type (Checking/Savings), routing number, account beneficiary's name, and nickname.
- Add International Account. You can add a recipient who has an account in an international bank by providing the details such as SWIFT code, bank name, account number, account type (Checking/Savings), routing number, account beneficiary's name, and nickname.
- Add Person to Person Account. You can add a recipient by providing the person's email address or mobile number.
Mobile Banking Screen

Multi Entity Support: Customers can view the dashboard, perform transfers, or view any request summary and submit requests against the entity associated with the customer during login. The feature is enhanced with Experience APIs to retrieve and post based on the Entity ID of the signed-in user.
- The Entity ID selected by the signed-in user flows through the application through the respective Experience API.
- For all fetch (GET) API calls, the system retrieves the results based on the Entity ID of the signed-in user.
- For all add/update/delete calls, the system passes and posts requests against the Entity ID of the signed-in user.
The feature supports the following modules:
| Authentication | Dashboard | Account Overview |
| Credit Card overview | Cheque Management | Card Management |
| Statements | Dispute Transactions | Service Requests |
| PFM | Savings Pot | Account Settings |
| Sign In Settings | Profile Settings | Consent Management |
| Unified Transfers | Manage Transfers | Manage Beneficiaries |
| Bulk Payments | Bill Payments | Foreign Exchange |
| Portfolio Management | WealthOrder | Approval Matrix |
Integration with Spotlight
The different options available under Transfers and Pay, that is, Transfer Money, Pay Bills, Send Money and Wire Transfers are displayed based on the user's entitlements within Spotlight. In case the user does not have access to any of these, that option is not available here and in the corresponding menu in the navigation pane.
Configuration
Backend Integration - Transact/MS/Mock
Using the runtime configurable parameter (Payment_Backend server property) at the Micro App level, an implementation team can configure the backend integration endpoint as Transact, or Mock as per customer needs for the following. The Payments Fabric MA supports the integration.
- The backend integration for all the APIs is mocked (DBX DB) or SRMS based on customer needs.
- The validations are avoided if the module is directly integrated with Transact endpoints.
- When records are created, use these options: Use the DBX DB table records that already exist, or use the Fabric Java layer to build a stubbed or JSON data response directly.
Follow these steps:
- Sign-in to your Fabric console.
- From the left pane, select Environments.
- For your Fabric run-time environment, click App Services.
- Navigate to Settings > Configurable Parameters.
- On the Server Properties tab, go to
PAYMENT_BACKENDField Name and set the Field Value depending on the integration (for example, MOCK or SRMS or SRMS_MOCK). - Click Save.
Fabric Server Properties
Current Transfers is via SRMS, as per the requirement, configuration name and configuration values should be as following:
| Module | Configuration name | Config Possible values |
|---|---|---|
| Payments | PAYMENT_BACKEND (Existing) | SRMS/STUB/T24 |
| Standing Orders | PAYMENT_BACKEND (Existing) | SRMS/STUB/T24 |
In this topic

